
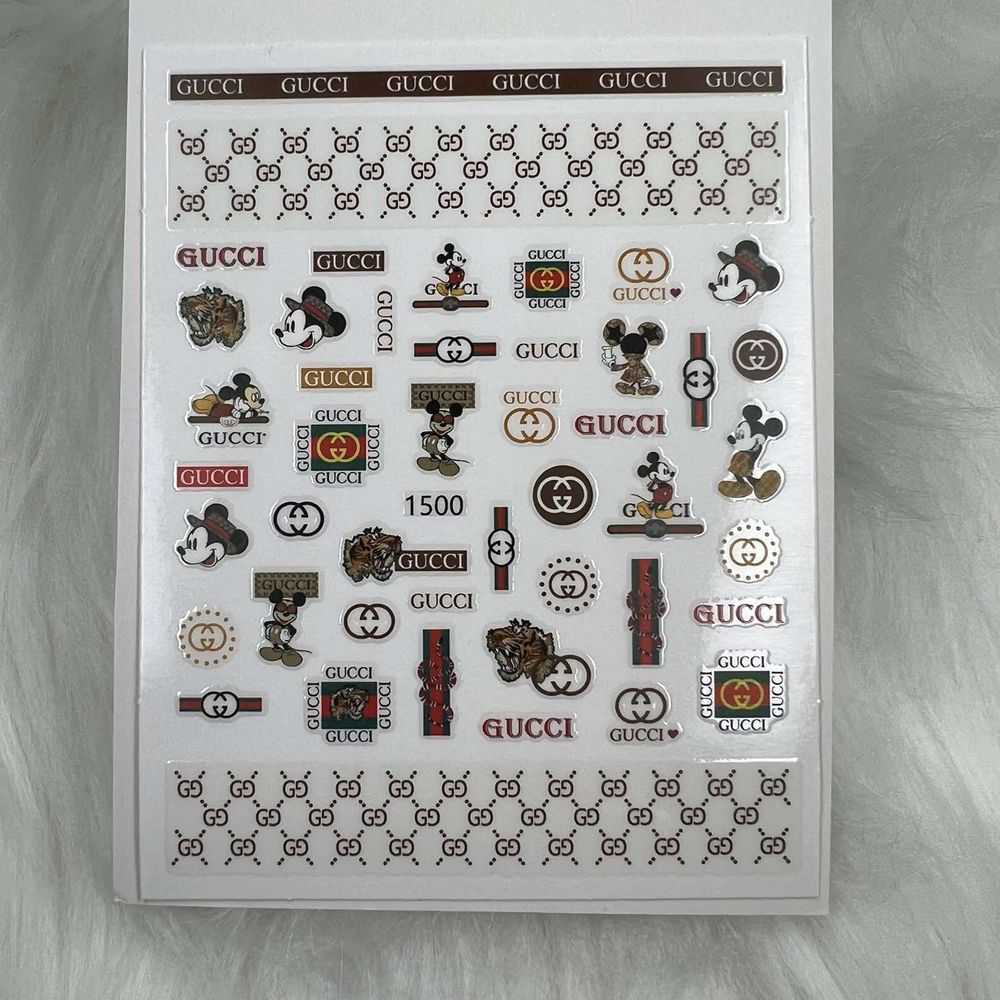
Want the instant impact of logo-driven nail art without the time or cost of a salon visit? Designer logo nail stickers are a fast way to add branded-style flair and precise details to manicures and pedicures. With a few pro techniques, you can make stickers look custom-applied and long-lasting.
What the product is and how it arrives
This item is a sheet of nail stickers designed for decorative use. The pack is an affordable add-on to any nail service or at-home kit, and a single unit is priced at $1.99 (price may change). The stickers are intended for direct application onto the nail surface.
Basic application workflow
Follow a simple, salon-style sequence to get the cleanest results: prep, apply, seal. For best adhesion, make sure the nail is clean and dry, the polish is fully set or tack-free, and the sticker is trimmed to match the nail shape before placement. Peel the decal from its backing and place it carefully on the nail, then smooth and seal with a top coat.
If you want to order extras for practice or to offer more styles in your salon, consider these logo nail stickers as a quick way to add variety to your services.
Step-by-step pro tips
- Prep the nail: Remove oils with a cleanser or alcohol wipe, and push back cuticles so the tip-to-cuticle area is clear.
- Choose a base: Apply a base color or clear polish and let it dry fully; a contrasting background makes logo stickers pop.
- Trim and test-fit: Cut the sticker down if needed to match nail width and test placement while the backing is still on.
- Apply with care: Use tweezers or a pointed tool to lift and position the sticker, pressing from center outward to avoid bubbles.
- Seal and protect: Cover the sticker edge-to-edge with a thin layer of top coat. Allow to dry completely; for gel top coats, follow your usual curing routine.
Placement and design ideas
- Accent nails: Use a logo sticker on one or two accent nails per hand and paint the rest a complementary solid color.
- French remix: Place a small logo near the cuticle or on the free edge for a modern French look.
- Mix-and-match: Combine several logos or pair with tiny gems and metallic strips for layered texture.
- Negative space: Apply stickers on sheer or nude bases and leave parts of the nail bare for contrast.
Who these stickers are for
These stickers suit nail artists who need fast branding elements, salon technicians looking for add-on décor, and hobbyists who want polished, professional-looking results at home. They’re a cost-effective way to test new looks without lengthy hand-painting.
Care, wear time, and safety notes
Longevity depends on prep and sealing. A well-applied top coat reduces lifting and chipping; reapply top coat every few days to extend wear. Keep stickers away from the eyes and mouth and do not ingest. If you use adhesive removers or strong solvents, test one sticker first to confirm compatibility with your polish system.
Packing and buying details
The product is sold as a nail sticker sheet and is designed for decorative nail use. It’s a low-cost option to expand your color and design offerings or to experiment with signature looks. You can find it from nail-supply vendors and specialty retailers; Dynamic Nail Supply lists this item among its decorative accessories.
Quick troubleshooting
- Bubbling: Press out air and finish with a thin top coat once the sticker is in place.
- Edges lifting: Clip or file the edge flush, then reseal with top coat, focusing on the rim.
- Sticker too large: Trim before removing the backing to retain crisp lines during placement.
With a little practice these designer logo nail stickers can deliver crisp, salon-level accents in minutes. Start with one or two accent nails, perfect your placement technique, and soon you’ll be mixing stickers into regular services for fast, high-impact nail art.